SDB:Live CD 安裝
| 可適用於 openSUSE | 推薦文章 | 相關文章 | |||
|
|
|||||
有些較早期發行版本的安裝畫面在 Installation ,這些可能會有些幫助。
在 Live 桌面安裝
放置您的 openSUSE 光碟在光碟機中,然後重開機,然後您會看到 開機畫面。
要看看他到底是什麼樣子,選擇 openSUSE 11.3 並等候 openSUSE 11.3 桌面載入,這是預設的選項,而且他不會改變您的電腦。
如果您選了 安裝 選項,您將直接進入步驟 1。
 br> |
桌面live CD 會開機進入一個全功能的 openSUSE 桌面,但有些限制以保護您的資料,請自在的探索這個桌面系統,當您覺得已經準備好要安裝時,雙擊桌面上的 Live Install 圖示,這將會開啟 openSUSE 的安裝與設定程式 YaST。
|
 br> |
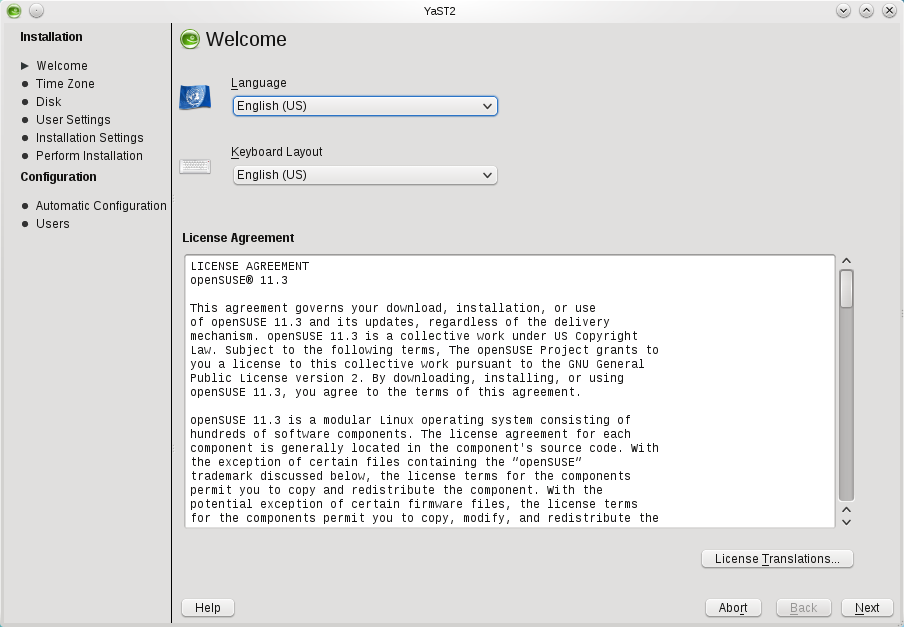
步驟 1: 歡迎畫面在畫面的上端,您可以設定您的語言與鍵盤類型,當語言設定後, YaST 會選擇適用的鍵盤類型,如果不正確,您可以由下拉式選單來修正。 在設定的下方是使用者的授權條款 (eula) ,要看其他種語言,按 License Translation。如果您接受這些條款,按 Next(下一步)。
|
 br> |
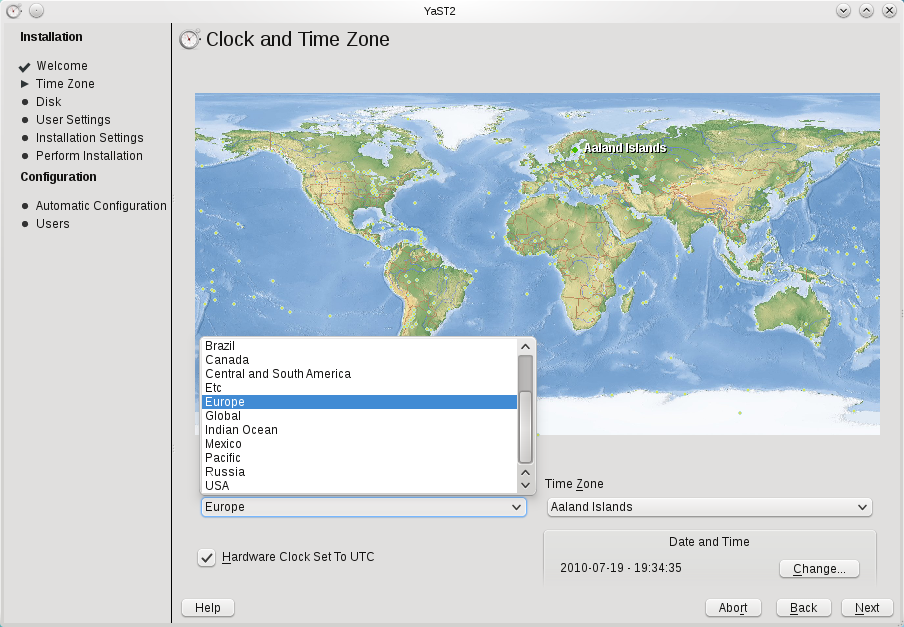
步驟 2: 設定時間在這裡, 您需要用世界地圖來設定您的時區,首先,在左邊的下拉式選單選擇大區域。
|
 br> |
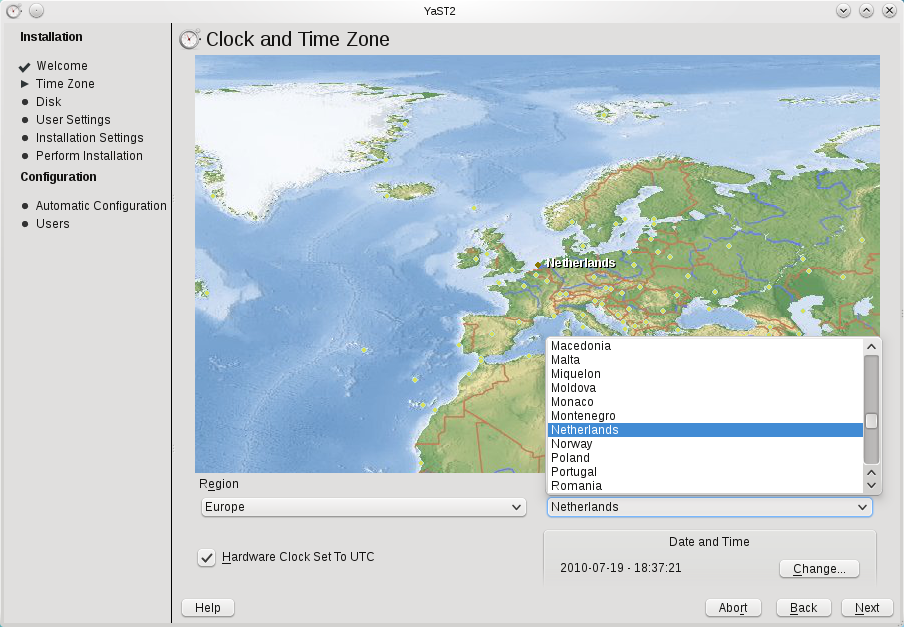
在右邊的下拉式選單,選擇您的正確位置。
|
 br> |
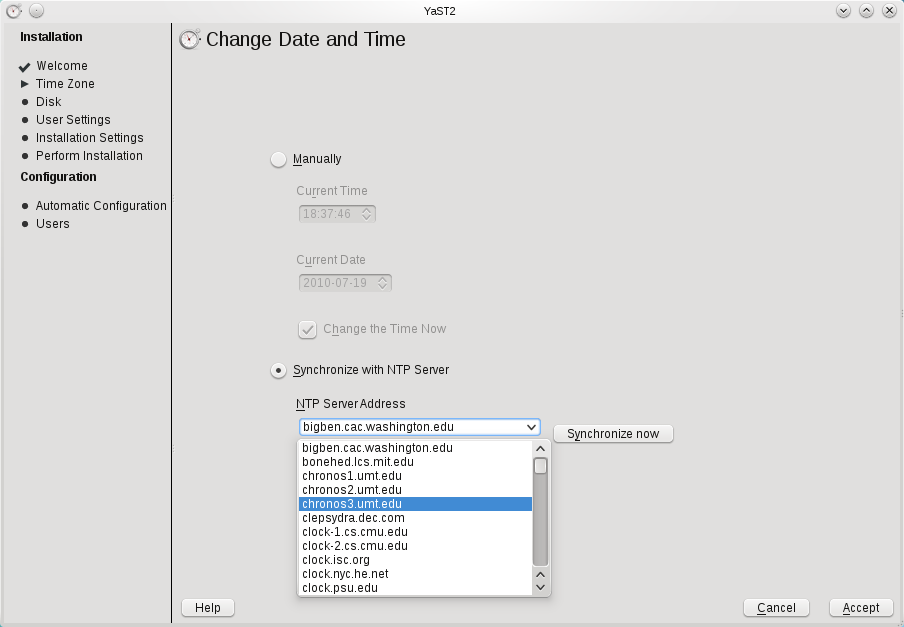
在時區的下方會顯示當前設定的時間,如果不正確,或您想要設定時間伺服器,按 Change(變更),您就可以手動變更時間或選擇 Synchronize with NTP server(與 NTP 伺服器同步)來使用時間伺服器, 您可以由下拉式選單中選擇一個時間伺服器,當按下 Accept(接受)之後,時間將自動同步化。 您必須有網際網路連線才能設定時間伺服器
|
 br> |
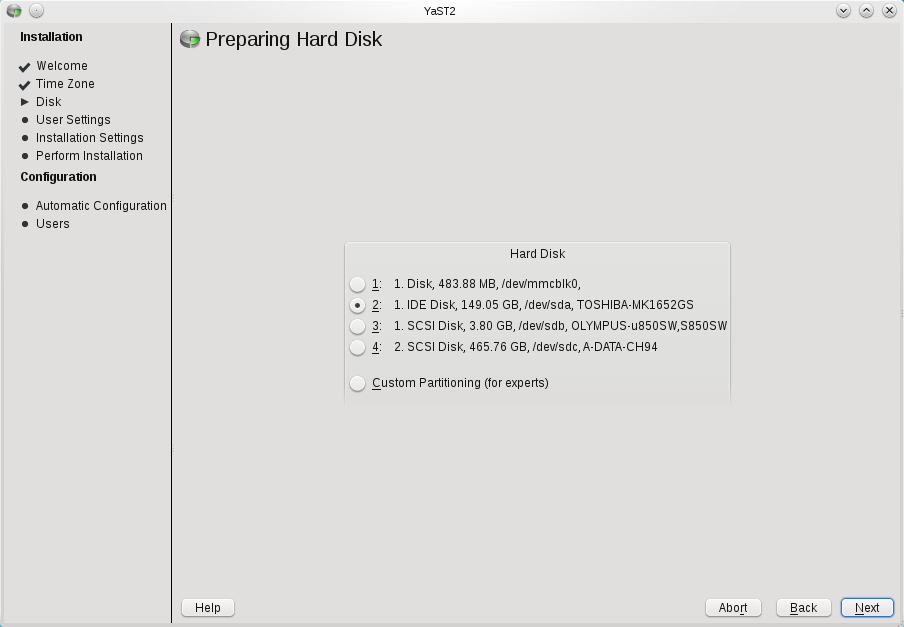
步驟 3: 設定您的硬碟選擇您要用來安裝的硬碟,如果您在同一個硬碟已經有了其他的作業系統 (例如, 微軟 Windows 或其他 Linux), YaST 將調整該作業系統的大小,讓他仍在您的電腦中,但有足夠的空間來安裝 openSUSE 11.3。
|
 br> |
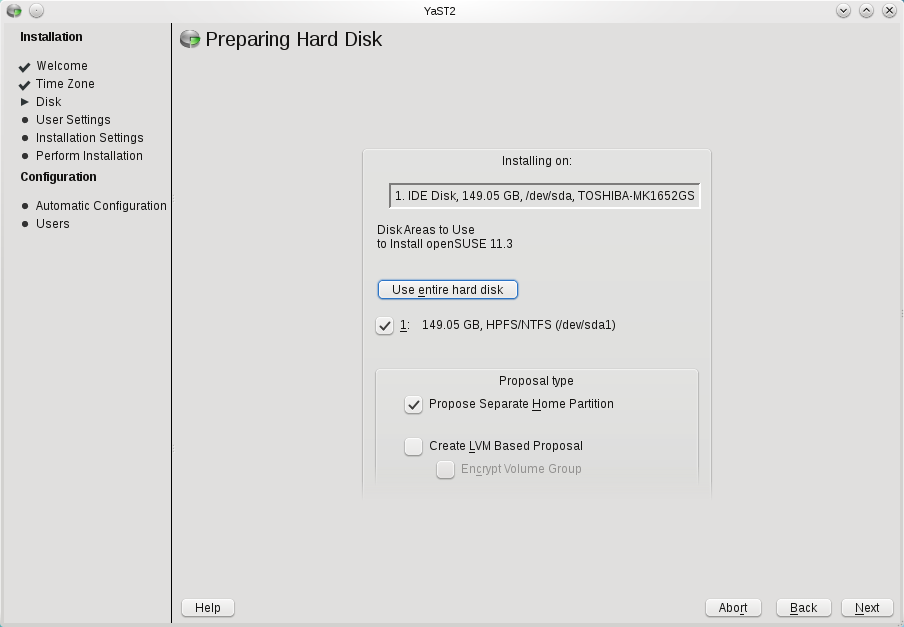
現在,您將看到 YaST 所建議的設定,如果您想要變更建議的設定,按 Edit Partition Setup...(編輯分割區設定...),如果您想完全重新規劃您自己的設定,按 Create Partition Setup...(建立分割區設定...),如果您想採用所建議的設定,按 Next(下一步)。
|
 br> |
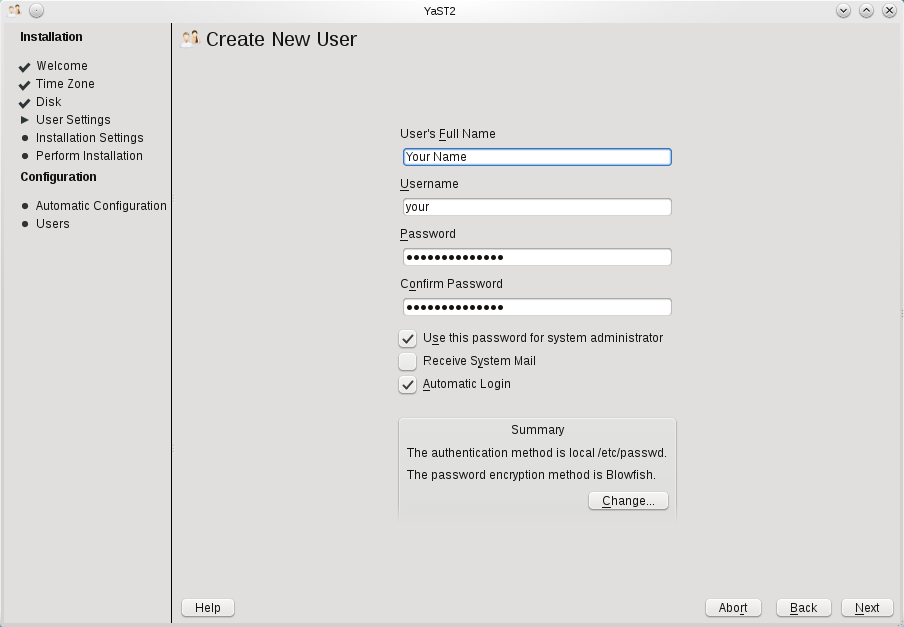
步驟 4: 建立主要使用者輸入您的全名, 此時會自動選擇一個使用者名稱,如果您願意的話,您也可以將使用者名稱改成您喜歡的。指定新的密碼,並再確認一次。在預設上,系統被設定為使用這個密碼當作管理員(也就是 root)的密碼。另外,自動登入也是預設開啟,如果您想要使系統更安全或有多重使用者,請取消核取這個選項。 YaST 會檢查您的密碼是否夠安全,如果密碼不夠安全,系統會給您提示,您可以選擇再次變更密碼或忽略此警告繼續下一步驟。
|
 br> |
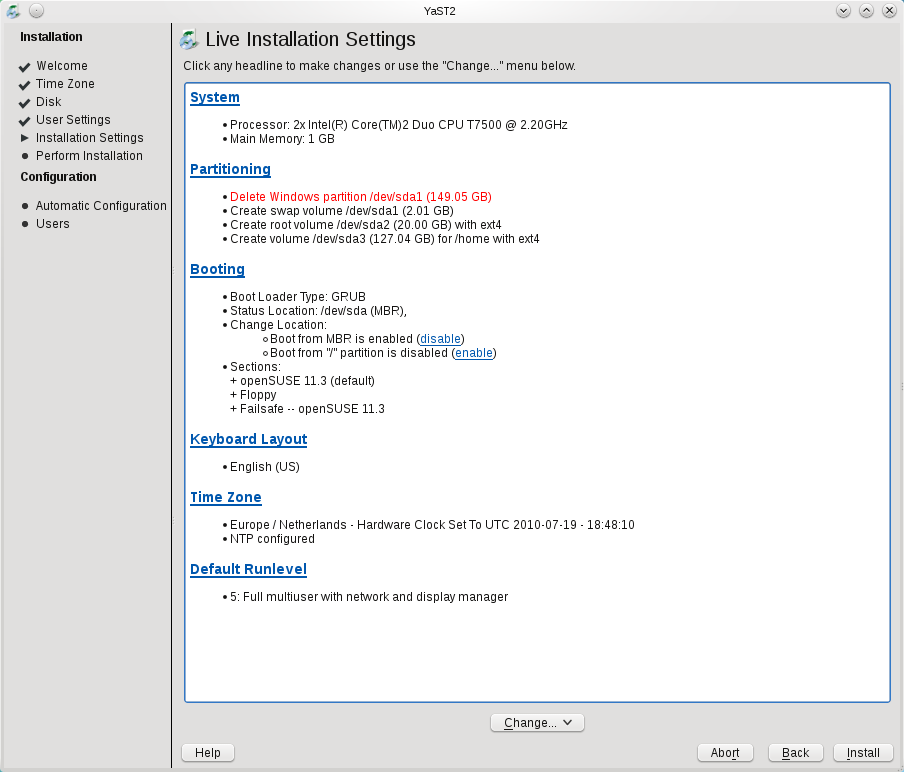
步驟 5: 安裝摘要這是一個關於 YaST 打算在您的系統進行工作的摘要,請仔細閱讀整個清單,如果您想要變更選項,按該章節的標題。您可以在 YaST 中查閱說明文字或 文件 已了解這些畫面是做什麼的。如果您同意這些建議,按安裝,您將被提示請您再次確認是否要繼續進行,按 Install(安裝)再次確認。
|
| [[File:{{{2}}}|200px|link=]] br> |
步驟 6: 安裝YaST 現正在安裝您的新 openSUSE 系統,一旦完成,您將被引導重新開機,請重開機並移除 openSUSE Live CD。 |
| [[File:{{{2}}}|200px|link=]] br> |
步驟 7: 完成安裝在第一次開機時, YaST 將自動設定您系統的硬體及網路。 |
br> |
完成安裝openSUSE 11.3 現已安裝完成! 一旦您登入, 會出現一個 openSUSE 問候畫面,上面會有許多關於 openSUSE 的資訊。更新應該已經自動設定完成,如果您已連接到網際網路,第一次更新的訊息很可能會出現。您可能會想參考一下 中文 FAQ 來開始!
|
安裝到大的分割區時的注意事項
Many users will be upgrading from previous dual boot windows-linux distributions. YaST will detect empty ext3 partitions, say on a second hard disk and offer to convert them to ext4. For example if there are two empty ext3 partitions it will create an root ext4 partition and data ext4 partition, with the larger partition being assigned to data (/home) by default. On modern systems the scary warning in the Boot section just before commitment during installation, that GRUB will place the bootloader above 125 GBytes and the user is risking that the bootloader will not be found can be disregarded (of course with a certain risk). A check is possible before commitment if you cancel the install at this stage before you lose a useful MBR. Without a valid MBR a disk will not be accessible anymore and steps must be taken to recover all the data on that disk You can do this in an old linux distro that uses GRUB by copying your old linux root partition to the partition that you will use, and adding a new entry to GRUB menu.1st with as root partition this test root partition. If a boot test goes well you can then delete the contents of the temporary test root partition and the SUSE installer may well use it as its default root ext4 partition.
下一步呢?
在這個維基上有許多 文件 可供您參考。